
Table of Contents
- What You'll Need Before You Start
- Safety Precautions: Power Down and Protect Your Device
- How to Clean Your Laptop Safely: Screen and Chassis
- Keyboard and Trackpad Maintenance
- How to Remove Dust From Laptop Fans
- Solutions to Avoid When Cleaning Your Laptop
- Laptop Maintenance for Performance: Preventing Future Buildup
- Troubleshooting Common Cleaning Damage
- Frequently Asked Questions
Last Updated: September 27, 2026
What You'll Need Before You Start
Cleaning your laptop safely requires the right supplies. Using the wrong materials can damage your screen, keyboard, or internal components.
A lint-free microfiber cloth is essential, it prevents fibers from sticking to your screen and avoids scratches that paper towels cause.
Isopropyl alcohol (70% concentration) disinfects and removes grime. Never use ammonia-based cleaners, bleach, or harsh solvents, they damage screen coatings.
Distilled water is safer than tap water, which leaves mineral streaks on screens.
You'll also need:
- Compressed air (canned or electric) for dust removal
- Cotton swabs for tight spaces and keyboard crevices
- Soft brush for vents and fans
- Small bowl or cup for mixing cleaning solution
Safety Precautions: Power Down and Protect Your Device
Before you clean your laptop safely, power it off completely, not sleep mode. This prevents electrical damage if moisture reaches internal components.
Wait at least five minutes after powering down to let your laptop cool.
Unplug the power adapter and remove the battery if possible. Modern laptops with non-removable batteries still need to be unplugged.
Ground yourself before touching internal parts to prevent static damage. Touch a metal chassis part, grounded outlet, or wear an anti-static wrist strap.
Never spray liquid directly onto your laptop. Instead, dampen your cloth first, then wipe surfaces. Excess moisture is the biggest cause of liquid damage.
Work in a well-lit, dust-free area away from open windows or fans that stir up particles.
How to Clean Your Laptop Safely: Screen and Chassis
Start with the screen. Use a dry microfiber cloth to remove loose dust, wiping gently from center outward.
For fingerprints or smudges, dampen your microfiber cloth with your isopropyl alcohol and water solution. Never spray liquid directly on the screen. Wipe in gentle, circular motions. Don't press hard, let the cloth do the work.
Many modern laptops have anti-glare coatings that harsh rubbing strips, so use lint-free cloths and gentle pressure.
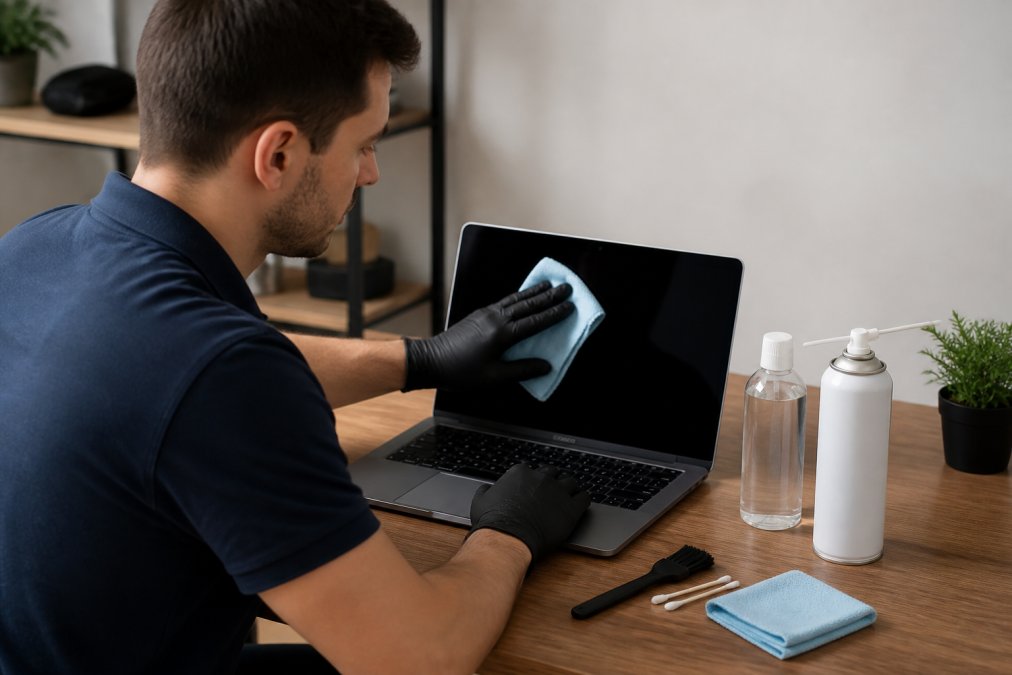
Cleaning the Screen Without Damage
Start dry with your microfiber cloth, many smudges come off without liquid.
For stubborn marks, apply diluted isopropyl alcohol to the cloth (not the screen) and wipe gently in one direction to avoid forcing moisture into the bezel.
Let the screen air dry completely (at least two minutes) before closing your laptop.
Wiping Down the Chassis and Exterior
Use your microfiber cloth with isopropyl alcohol solution on all exterior surfaces, paying extra attention to edges and seams where dust accumulates.
For stubborn stains, let the damp cloth sit for 10 seconds to soften grime, then wipe gently.
The keyboard collects the most debris. Wipe between keys with a slightly damp cloth or cotton swab, avoiding drips between keys.
Keyboard and Trackpad Maintenance
Your keyboard and trackpad harbor bacteria, dust, and oils. Cleaning them regularly improves hygiene and performance, but the method depends on your keyboard type.
Identify your keyboard type first. Most laptops use scissor-switch or rubber-dome keyboards. Check your manual because different switches tolerate moisture differently.
Dust removal (all keyboard types):
Shut down your laptop and tilt it at a 45-degree angle. Use short bursts of compressed air (1-2 seconds) held 3-4 inches from the keyboard, working downward. For stubborn dust, use a soft brush to dislodge particles before blowing with compressed air.
Cleaning vs. disinfecting the key caps:
Cleaning removes visible dirt and grime; disinfecting kills bacteria and viruses. These are different goals requiring different approaches.
For cleaning only, use a slightly damp microfiber cloth with your isopropyl alcohol and water solution. Wipe each key cap gently. Don't pry keys off unless your laptop manual explicitly permits it, modern scissor-switch keys are fragile and won't reseat properly if removed. Focus on the tops and sides of keys where fingerprints and grime accumulate.
For disinfection, use a cloth dampened with 70% isopropyl alcohol (not diluted). Wipe each key cap and the spaces between keys. The 70% concentration kills surface pathogens (bacteria, viruses, fungi) more effectively than diluted solutions (the CDC). Let the alcohol evaporate naturally, it typically dries within 60-90 seconds. Do not use bleach-based disinfectants or quaternary ammonium wipes on keyboards; they can corrode metal contacts under the keys and damage the rubber dome or scissor mechanism.
Trackpad care:
Your trackpad collects oil and dust from your fingers, which reduces responsiveness. Wipe it with a cloth dampened in your isopropyl alcohol solution (diluted 1:1 with distilled water for general cleaning, or 70% isopropyl alcohol for disinfection). Use gentle pressure and wipe in one direction. Avoid circular motions, which can push oils into the sensor edges. Let it dry completely (at least 60 seconds) before using your laptop again.
Tight spaces and crevices:
Cotton swabs work well for cleaning around key edges and between the keyboard and trackpad. Dampen a swab lightly with your cleaning solution, avoid over-saturating, as excess liquid drips into the keyboard mechanism and causes sticky keys or electrical shorts. For stubborn residue between keys, let the damp swab sit for 5-10 seconds to soften the material, then gently wipe.
Material-specific considerations:
If your keyboard has a rubberized coating on the palm rest or keys, avoid excessive alcohol exposure. Rubberized coatings can become sticky or degrade with repeated high-concentration isopropyl alcohol use. Use diluted solution (1:1 with water) on rubberized surfaces and wipe dry immediately. Aluminum or plastic key caps tolerate 70% isopropyl alcohol better and dry faster.
Maintenance interval:
Clean your keyboard weekly with a dry cloth or compressed air to prevent dust buildup. Deep clean (with dampened cloth) every two to four weeks depending on use and environment. If you eat near your laptop or work in a dusty environment, increase frequency to weekly deep cleaning.
How to Remove Dust From Laptop Fans
Dust buildup inside your laptop reduces airflow and causes overheating. Removing dust from laptop fans improves cooling system performance and prevents hardware damage.
Use compressed air to blow dust out of the fan intake vents. Locate the vents on your laptop, they're usually on the sides or back. Hold the can upright and use short bursts. Tilt your laptop to help dust fall away.
For stubborn dust, you may need to open your laptop. Check your user manual first, some models make this easy, others don't. If you're uncomfortable opening your device, consider professional cleaning.
When using compressed air on fans, prevent the fan from spinning too fast. Hold the fan blade still with a small tool if you can access it. Spinning fans at high speed can damage the bearing.
Work outside or in a well-ventilated area. Compressed air blows dust everywhere. You don't want it settling back on your laptop or other electronics.
After blowing out dust, wait a few minutes for any remaining particles to settle. Power on your laptop and listen. Fans should be quieter if overheating was the issue. If your laptop still runs hot, internal cooling paste may need replacement.
Solutions to Avoid When Cleaning Your Laptop
Many common household cleaners damage laptops. Knowing what NOT to use prevents costly mistakes.
Never use ammonia-based window cleaners. Ammonia strips protective coatings from your screen and damages anti-glare finishes. Once removed, these coatings can't be replaced.
Avoid bleach and disinfectant wipes. They're too harsh for electronics. Bleach corrodes metal components and damages plastic. Disinfectant wipes contain alcohol concentrations that are too high.
Don't use abrasive materials like paper towels, tissues, or rough cloths.
Laptop Maintenance for Performance: Preventing Future Buildup
Regular maintenance keeps your laptop running smoothly and reduces the need for deep cleaning. Small steps now prevent big problems later.
Troubleshooting Common Cleaning Damage
Sometimes cleaning goes wrong. Knowing how to respond limits the damage.
Frequently Asked Questions
Can I use alcohol wipes to clean my laptop?
Isopropyl alcohol diluted with distilled water is safe for most laptop surfaces, but avoid wipes with high alcohol concentration or additives. Test on a small area first. Never pour liquid directly onto your device. For screens, use a solution of 50% isopropyl alcohol and 50% distilled water on a lint-free cloth. Avoid ammonia-based cleaners entirely, as they can damage screen coatings.
What's the safest way to clean a laptop screen?
Power down and unplug your laptop first. Use a lint-free microfiber cloth slightly dampened with a 50/50 mix of isopropyl alcohol and distilled water. Wipe gently with no pressure, let the cloth do the work. Never spray liquid directly on the screen, and avoid abrasive materials. Pay attention to screen coatings like anti-glare finishes, which can be damaged by harsh chemicals.
How do I clean dust from my laptop without damaging internal components?
Use compressed air held upright, keeping the nozzle 3-4 inches away from vents and fan intake areas. Short bursts work better than continuous spraying. Direct air away from openings to push dust out, not further inside. Never use a vacuum, which creates static electricity that can harm electronics. For visible debris in keyboard crevices, use a cotton swab or soft brush. If dust buildup is heavy, consider professional cleaning to avoid liquid damage or static discharge.
How often should I clean my laptop to maintain performance?
Clean your laptop every 3-6 months, or more frequently if you work in dusty environments. Regular preventative maintenance prevents dust buildup that causes overheating and reduces cooling system efficiency. Monthly keyboard and trackpad wipes keep debris from accumulating. Quarterly vent cleaning with compressed air maintains proper ventilation. Post-cleaning maintenance includes checking that all ports are clear and fans spin freely. Consistent cleaning extends hardware lifespan and prevents performance degradation.
Cleaning your laptop safely protects your investment and keeps your device running smoothly. The right supplies and gentle technique prevent damage. When you're unsure about opening your laptop or removing internal dust, TonyV's Tech Repair offers professional cleaning services. We'll handle the dust removal and maintenance so you don't have to worry about doing it wrong. Book a Service today and keep your laptop in top condition.