
Table of Contents
- Why Charging Cables Get Stuck in Phone Ports
- Tools You Need and Tools to Avoid for Charging Port Extraction
- Step-by-Step: How to Safely Remove a Stuck Charging Cable
- What to Do When a Broken Charger Tip Is Stuck in Your Phone Port
- How to Clean Your Phone Charging Port Safely After Removal
- When to Stop and Call a Professional for Port Repair
- Preventing Future Charging Port Problems
- Frequently Asked Questions
Last Updated: September 14, 2026
Why Charging Cables Get Stuck in Phone Ports
A stuck charging cable is almost always caused by debris packed into the port, not a broken connector. Pocket lint, dust, and fabric fibers compress against the back wall with every insertion, and over months that layer grips the plug and locks it in place.
At TonyV's Tech Repair, we see this on a weekly basis, and the fix is usually simpler than the panic suggests. The USB Implementers Forum's USB Type-C specification defines the port cavity and pin spacing that make this buildup possible. The space between the connector and the port walls is measured in fractions of a millimeter, so even a small amount of lint creates real mechanical resistance.
Three things cause most stuck cables:
- Compacted lint and dust wedged against the internal pins
- A bent or swollen cable housing that no longer slides out cleanly
- A damaged connector tip that has partially separated from the cable body
Which one you're dealing with changes how you remove it. Pulling harder is never the answer, it turns a cleaning job into a repair.
Tools You Need and Tools to Avoid for Charging Port Extraction
The right extraction tools are non-metallic and thin enough to reach the port floor without touching the pins. A wooden toothpick, a plastic dental pick, and compressed air cover most situations.
What you should never put near a charging port:
- Paperclips, metal, sharp, and perfectly sized to bridge contact points
- Metal tweezers, same short circuit risk, plus they scratch the pin plating
- Sewing needles or pins, these bend pins permanently
- Compressed air at close range, held too near the port, it drives debris deeper instead of out
A plastic spudger or nylon pick costs little and eliminates the short circuit risk. A wooden toothpick works too, if you keep it angled away from the pins.
Step-by-Step: How to Safely Remove a Stuck Charging Cable
Removing a stuck charging cable safely means powering down first, then applying steady, low-force pressure rather than a hard yank, on a clean, well-lit surface.
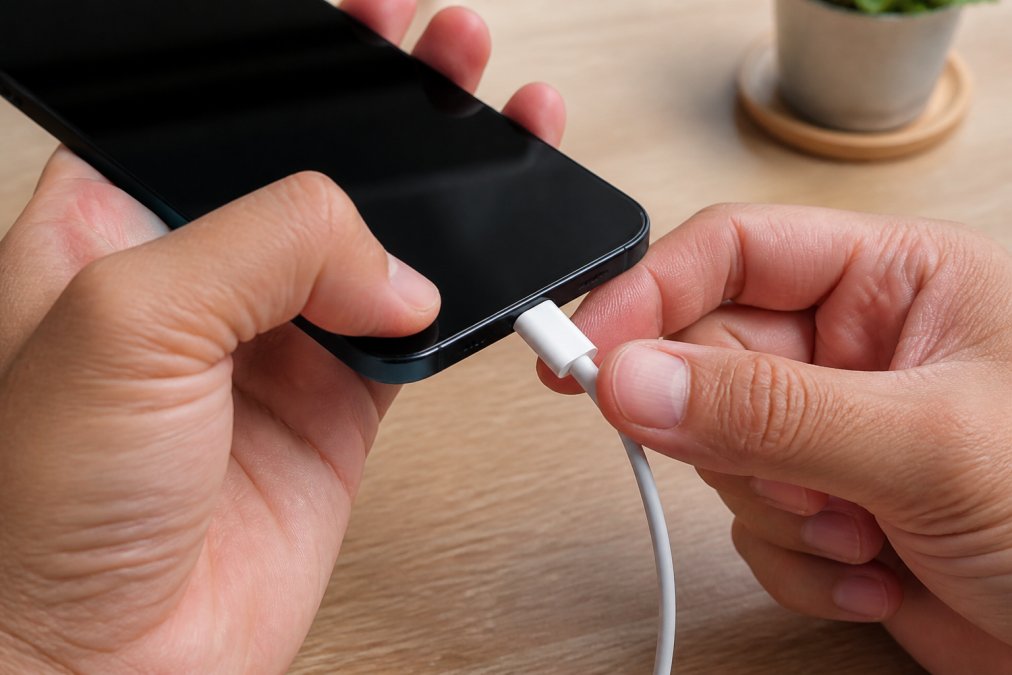
Before you start, check the port with a flashlight. If the metal tip is seated normally, you have a grip problem. If it looks bent or the housing is swollen, stop and read the next section.
Method 1: Gentle Wiggle and Pull
This works when the cable is stuck but undamaged. Hold the phone firmly and grip the connector, not the cord.
Apply slow side-to-side pressure, no more than a few degrees each way, while pulling straight out. The goal is to break the friction seal, not force the plug free. Most stuck cables release within ten to fifteen seconds.
If nothing moves after a minute, stop. You're now in debris-compaction territory, and Method 2 is the better approach.
Method 2: The Toothpick and Superglue Technique
The toothpick and superglue technique is a last resort for a broken charger tip stuck in your phone port, where the metal tip has separated from the cable and offers nothing to grip. It works, but requires patience and very little adhesive.
Here's the process:
- Power the device off completely and remove any case
- Cut a wooden toothpick to a short, flat-tipped length
- Apply the tiniest possible dot of superglue to the flat tip
- Press the toothpick tip against the broken connector fragment
- Hold steady for the full curing time listed on the glue packaging
- Pull straight out with slow, even pressure
The superglue method fails more often than it succeeds when too much adhesive is used: adhesion needs a clean, dry surface, and a fragment inside a port is rarely clean.
What to Do When a Broken Charger Tip Is Stuck in Your Phone Port
A broken charger tip stuck in your phone port is a different problem from a stuck cable. There's nothing to grip, so pulling harder only pushes the fragment deeper against the pins.
Assess the situation before acting:
| Situation | Best Approach | Risk If Ignored |
|---|---|---|
| Tip visible, cable intact | Gentle wiggle and pull | Low |
| Tip visible, cable detached | Toothpick and superglue | Adhesive damage to port |
| Tip flush with port floor | Professional extraction | Pin damage, charging failure |
| Tip not visible at all | Professional extraction | Internal pin deformation |
If the fragment sits flush with or below the port opening, stop. Tools thin enough to reach it can bend the internal pins, which aren't user-replaceable on most phones.
Device type matters. Lightning ports have a flat, shallow cavity that's relatively forgiving. USB-C ports are deeper with a fragile center tongue, the most common casualty of DIY extraction. If your phone uses USB-C and the fragment is deep, the risk outweighs the savings.
How to Clean Your Phone Charging Port Safely After Removal
Cleaning your phone charging port safely after extraction means removing loose debris without pushing anything back into the cavity, then verifying the extraction didn't damage the internal pins. Most guides stop at cleaning; verification tells you whether the port is actually healthy.
Power the device off and work under bright light. A flashlight held at a low angle across the port opening throws the pins into relief, making lint, bent contacts, and discoloration visible.
Step 1: Dry-Brush the Port
Use a dry, soft-bristled brush, a clean toothbrush works, and sweep at a shallow angle from the back wall toward the port mouth so debris exits rather than compacts. Don't scrub the center of a USB-C port; the pin-carrying tongue is the most fragile part.
Step 2: Dislodge Stubborn Lint
A wooden toothpick can lift lint packed along the port walls, but keep it flat against the wall and angled away from the center. Never pry upward against the pin side, and skip cotton swabs, the fibers shed and snag on the pin plating.
Step 3: Clear Loose Debris With Air
Follow with short bursts of compressed air held several inches away, angled so debris exits rather than compacts. Never insert the nozzle into the port, too close drives lint deeper against the back wall and recreates the original problem.
Step 4: Run a Post-Removal Port Health Check
This step tells you whether the extraction caused damage. Do it before you plug anything back in.
Check four things under good light:
- Pin alignment. Look at the row of contacts inside the port. They should sit in a straight, even line. A single pin bent upward, downward, or sideways is a deformation that will cause intermittent charging even if the port looks otherwise fine.
- Center tongue (USB-C only). The tongue should be centered in the cavity with even gaps on both sides. If it's pushed to one side or shows a visible crack, the port has sustained structural damage.
- Discoloration or burn marks. Dark or scorched spots on the pins or port walls indicate arcing or heat damage. Stop using the port and have it inspected.
- Loose fragments. Shine the light at a low angle and look for any remaining metal slivers or adhesive residue from a superglue attempt. Adhesive residue left on the pins can prevent a clean electrical contact.
Step 5: Test With a Known-Good Cable
Once the port is clean and visually intact, test it with a cable you know works on another device. Insert it slowly and watch for three signals:
- Seat depth. The connector should slide in and stop with a firm, even feel. If it stops short or feels gritty, debris or a bent pin is still in the way.
- Wiggle test. With the cable seated, apply very light side-to-side pressure. A healthy port holds the connector firmly. A port that lets the cable rock or drop connection has worn or damaged retention features.
- Charge behavior. Plug into a known-good charger and watch for a steady charging indicator. Intermittent charging, starting and stopping, points to pin contact problems rather than a cleaning issue.
If the port passes all three checks, you're done. If it fails any, the extraction likely caused damage, a hardware repair, not a cleaning problem. Document what you observed (bent pin, discoloration, intermittent charging) before contacting a repair provider; that description speeds up diagnosis.
When to Stop and Call a Professional for Port Repair
Stop and call a professional when the fragment won't budge after two careful attempts, when you see bent or discolored pins, or when the port no longer charges at all. Continuing risks turning a cleaning job into a full port replacement, and on most modern phones the port is soldered to the main board, so that often means board-level repair.
The Stop Signals
Three signals mean it's time to hand the device off:
- The fragment is below the port opening and you can't see it clearly. Tools thin enough to reach it are also thin enough to bend the internal pins, and those pins are not user-replaceable on most phones.
- The port shows any physical deformation around the opening or pins. A bent pin can short two contacts together the next time you plug in, which can damage the charging circuit rather than just the port.
- Charging fails entirely after the cable is removed. If the device won't recognize a known-good cable, the problem has moved past debris and into the electrical path.
Warranty and Insurance Implications of DIY Extraction
This matters more than the extraction itself if your device is still under coverage.
Manufacturer warranty. Most manufacturer warranties cover defects in materials and workmanship, not owner-caused damage. A port that fails because lint was packed into it is generally treated as wear, not a defect. If a technician finds evidence of a DIY extraction attempt, scratch marks around the port, adhesive residue inside the cavity, a bent pin consistent with a tool, the warranty provider may deny a related claim. Exact language varies by manufacturer and by the terms in effect when you bought the device, so read your specific warranty document.
Extended warranties and protection plans. Third-party plans typically exclude "damage caused by unauthorized repair or modification," which a failed DIY extraction can fall under. Check the plan's terms first, many cover professional port cleaning or repair at low or no cost, making the DIY route a bad trade.
Homeowner's or renter's insurance. These policies sometimes cover accidental damage to electronics, but the deductible usually exceeds the cost of a port repair. They are rarely the right path for a stuck cable.
Credit card purchase protection. Some cards include purchase protection that covers accidental damage for a limited window after purchase. If the device is new and the damage is recent, this is worth checking before paying out of pocket.
What to Tell the Repair Provider
When you hand off the device, describe what happened plainly: what got stuck, what you tried, what tools you used, and what you observed afterward. Mention any adhesive you applied, even if you think it didn't stick, a technician who knows superglue was involved approaches the extraction differently.
At TonyV's Tech Repair, we handle port extractions and cleanings as a straightforward service, and we'll tell you honestly if the port is fine and the cable was the problem. Our Basic Repair Service starts at $25 and covers diagnosis, extraction, and a clear explanation of what we found. If your device can't wait, our Emergency Same-Day Repair service is built for exactly this situation.


The Consumer Product Safety Commission's guidance on battery and charging safety is worth reviewing if you notice heat, swelling, or a burning smell around the port. Those symptoms mean the device should not be charged again until it's inspected.
Preventing Future Charging Port Problems
Prevention comes down to two habits: keep the port covered and the cable clean. A simple port plug costs almost nothing and blocks the lint behind most stuck cables.
Other habits that make a real difference:
- Store phones in pockets without loose lint or fabric debris
- Check cable connectors for bent housings before inserting them
- Never force a cable that doesn't seat smoothly
- Clean the port lightly every few months rather than waiting for a problem
If you'd like ongoing help keeping your devices in working order, our Monthly Tech Support Plan covers unlimited questions and priority scheduling for $30 a month.

Frequently Asked Questions
Can I use pliers to remove a stuck charging cable?
No. Pliers apply uneven pressure that can crush the connector, bend the internal pins, or crack the plastic casing around the port. The metal jaws can also bridge contact points and cause a short circuit. If the cable is truly stuck, use a gentle wiggle-and-pull motion first. If that fails, a wooden toothpick with a tiny drop of superglue on the broken tip works better. Pliers are one of the tools to avoid entirely for this repair.
Is it safe to use a needle to clean a charging port?
A needle is risky because it is metal and conductive. If it touches the internal pins while the device is on, it can cause a short circuit or scratch the delicate contact points. Use a wooden toothpick or a plastic dental pick instead. They are non-conductive and soft enough to lift lint without damaging the port. Always power the phone off before cleaning, and never spray compressed air directly into the port because it can push debris deeper.
What should I do if the tip of my charger broke off inside the phone?
First, do not poke at it with anything metal. Power the phone off. If a small piece of the broken connector is visible, you can try the toothpick and superglue method: put a tiny drop of superglue on the tip of a wooden toothpick, touch it to the broken piece, let it cure for about 60 seconds, then pull gently. If the piece is deep or you see damaged internal pins, stop and take it to a repair professional. Forcing it out can cause permanent mechanical damage.
Will pulling a stuck cable damage my phone's charging pins?
Yanking or twisting the cable can bend or break the internal pins inside the port. Those pins are delicate and soldered to the phone's main board. Once bent, they may not make contact with the cable, leading to charging failure or a loose connection. Always pull straight out with steady, gentle pressure. If the cable does not release after a few tries, stop and use a non-metallic extraction method or seek professional service.
A stuck charging cable is stressful, but it rarely means your phone is damaged, and it almost never requires a new device. The right approach is patience, non-metallic tools, and knowing when to hand it off. TonyV's Tech Repair offers honest, jargon-free diagnosis, same-day emergency repair, and a clear explanation of what's actually wrong before anything gets fixed. Book a service with us and get your phone charging reliably again.